All I Want for Christmas is…

photo 1There are a few things that have to happen for it to be Christmas. There MUST be the Amy Grant 1980s Christmas album – we listened to it so often in my childhood on cassette tape in our Toyota station wagon that my brother not only have the song order and transitions committed to memory, but also the instrumental parts of each song.

There also must be a Christmas tree, naturally. A fairly new tradition for me is that there must be egg nog in the fridge to add to my coffee each morning (yum). And certainly, cookies must be baked and consumed in large quantities in order for it to be Christmas.

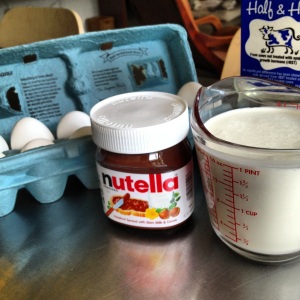
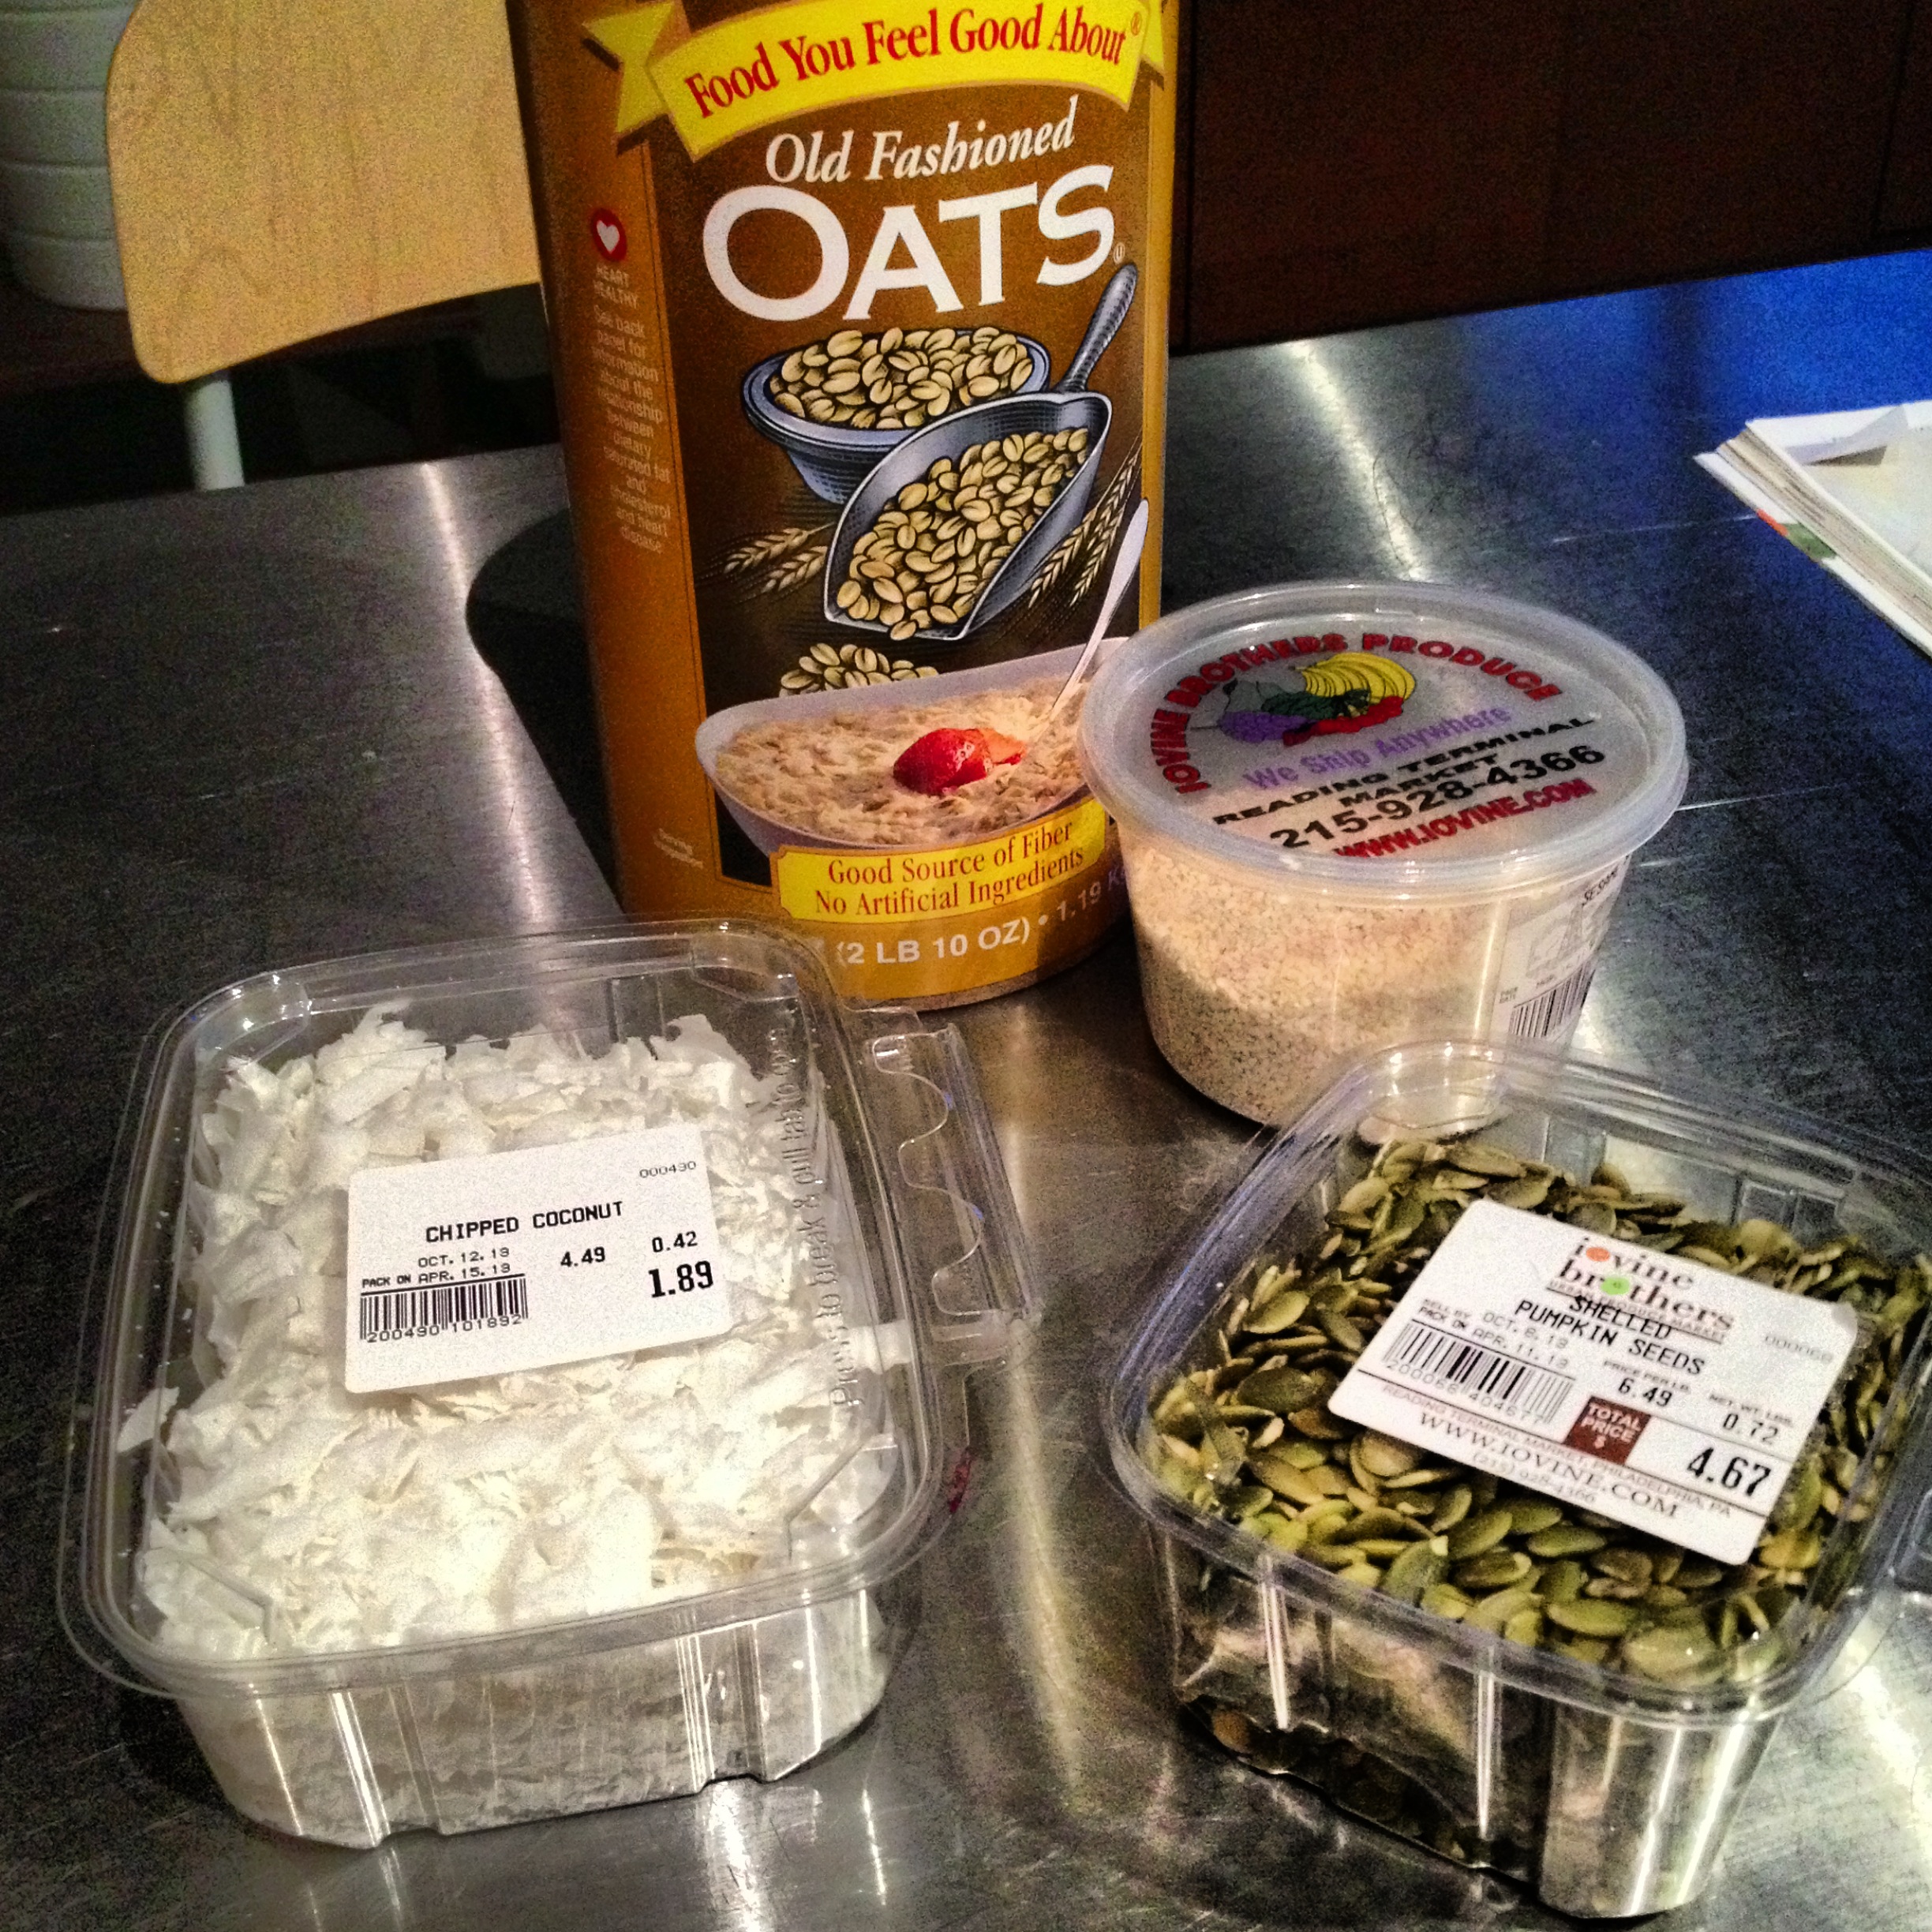
Like the pseudo-non-traditional Christmas album choice, some of my baking ingredients pictured above may be a bit strange to some. But the sugar cookies and gingerbread men aside, the three cookies I am writing about are all tied for my favorite (along with my mother’s peanut butter fudge), and are certainly necessary components of my annual cookie pig-out.

Three doughs ready to be baked

Three doughs ready to be baked

The first two cookies have many similarities – they both involve pressing dough that has been rolled into a ball into flat discs and then adding something to the top of the cookie.

photo

Cookie prep work

The first is strange to make, strange to look at, and strange to taste at first. They sport the green and red of the season, and are honestly the only reason I knew the word pistachio growing up.  These cookies are a bit sweet (they are made with pistachio pudding – see, strange to make) and a bit savory (thanks to the Bisquick), and take literally minutes to whip up.

After combining the ingredients, the dough is rolled into balls and pressed down into discs by the bottom of a glass that has been dipped in granulated sugar. I can still picture the Charlie Brown glass that I would always use to complete this step as a child. A halved Maraschino cherry is then placed in the center before they are whisked into the oven. If you want picture-perfect cookies, try to get all the excess cherry juice off the cherries before pressing them into the cookie, or you will have red-spotted green cookies (which are even stranger to look at!)

photo 2 photo 3

The second cookie begins with balls of peanut butter cookie dough baked and followed by Hershey’s kisses being pressed into them as they emerge from the oven. I have altered this recipe from my childhood slightly given that I prefer the dark chocolate kisses to the milk chocolate ones.

photo 5 photo 1

Tips:

  1. Don’t bake the cookies with the chocolates already in them (let’s leave it there).
  2. Don’t touch the kisses until the cookies have completely cooled. Although they hold their shape, they are ever so slightly melted by the heat of the cookie that the chocolate will smear and you will have to eat it before anyone sees it (On second thought…)

The last cookie is boring in comparison, but as I said, it is not Christmas without them: butterscotch chip cookies.  Yup, just substitute butterscotch chips for chocolate chips in the Tollhouse recipe (leave out the nuts, too), and that’s that!

photo 3

Homemade vanilla extract

This post gives me the chance to highlight an essential baking ingredient that we haven’t purchased in a while. After hearing Ina Garten preach about the merits of “good vanilla” (ie. real vanilla extract), she reveals in one episode that she often uses her own extract which is simply vanilla beans that have macerated in vodka (or rum) for several weeks/months.  This was my first bottle, and I think I will add one more vanilla bean next time, but I have been impressed by it.

photo 5

The two extremely fun times with Christmas cookies growing up were decorating the sugar cookies and being able to eat cookies and fudge for breakfast on Christmas morning while opening our presents. (I will also add beef jerky to my list of things that are necessary for Christmas as it was always in our stocking, and supplemented my all-sugar binge every year.)  As an adult, I now enjoy pouring some of that egg nog together with brandy, or adding some Bailey’s to hot chocolate and basking in the vocal stylings of 80s Amy Grant while enjoying these necessary sweets of the season.

Bon appétit.

photo 4

Pistachio Pudding Cookies

Ingredients

  • 1 cup Bisquick
  • 3.4oz package of pistachio pudding mix
  • 1/4 cup vegetable oil
  • 1 egg
  • granulated sugar
  • Maraschino cherries, halved

Directions

  1. Pre-heat the oven to 350 degrees.
  2. Mix all ingredients together in a bowl.
  3. Shape the dough into one inch balls.
  4. Place 2 inches apart on a baking sheet and flatten with the bottom of a glass dipped in sugar.
  5. Place half a cherry in the middle of each cookie.
  6. Bake for 8-10 minutes, until the edges are a delicate brown.

Peanut Butter Blossoms

Ingredients

  • Hershey’s Kisses
  • 1/2 cup shortening
  • 3/4 cup creamy peanut butter
  • 1/3 cup granulated sugar
  • 1/3 cup packed light brown sugar
  • 1 egg
  • 2 tablespoons milk
  • 1 teaspoon vanilla extract
  • 1-1/2 cups all-purpose flour
  • 1 teaspoon baking soda
  • 1/2 teaspoon salt
  • Additional granulated sugar

Directions

  1. Heat oven to 375°F. Remove wrappers from chocolates.
  2. Beat shortening and peanut butter in large bowl until well blended. Add 1/3 cup granulated sugar and brown sugar; beat until fluffy. Add egg, milk and vanilla; beat well. Stir together flour, baking soda and salt; gradually beat into peanut butter mixture.
  3. Shape dough into 1-inch balls. Roll in granulated sugar; place on ungreased cookie sheet.
  4. Bake 8 to 10 minutes or until lightly browned. Immediately press a chocolate into center of each cookie; cookie will crack around edges. Remove from cookie sheet to wire rack. Cool completely.

Butterscotch Chip Cookies

Ingredients

  • 2 1/4 cups all-purpose flour
  • 1 teaspoon baking soda
  • 1 teaspoon salt
  • 1 cup (2 sticks) butter, softened
  • 3/4 cup granulated sugar
  • 3/4 cup packed brown sugar
  • 1 teaspoon vanilla extract
  • 2 large eggs

Directions

  1. Preheat oven to 375° F.
  2. Combine flour, baking soda and salt in small bowl. Beat butter, granulated sugar, brown sugar and vanilla extract in large mixer bowl until creamy. Add eggs, one at a time, beating well after each addition. Gradually beat in flour mixture. Stir in morsels.
  3. Drop by rounded tablespoon onto ungreased baking sheets.
  4. Bake for 9 to 11 minutes or until golden brown. Cool on baking sheets for 2 minutes; remove to wire racks to cool completely.
Posted in Uncategorized | Leave a comment

Something old, and something new

Hello internet(s)!

It has been a while since I posted here. And it’s not because Brandon and I haven’t been eating. Since I last posted, we purchased a house and moved. So WHAT we have been eating has not been very adventurous as we continue to unpack and become acquainted with the new kitchen.  Oh, and there’s this little thing called a job that gets in the way, too!

[P.S.  Be on the lookout for a new blog about our adventures renovating the house..]

Regardless, I am currently on vacation (!!) and have had time to start a lot of renovation in the house, and to do some cooking. Last night for dinner I made something that Brandon and I enjoy, but have not had for quite a while – pot pie.

The reason that I titled this post the way I did is because I view pot pies similarly to frittatas. They are an excellent place to hide leftovers! We have made pot pies with chicken left over from a roast and when the refrigerator is spewing a random assortment of vegetables that need to be used, wrapping them in a pastry crust and homemade sauce is a perfect use. For this purpose, we also supplement whatever fresh vegetables we have on hand with frozen vegetables (which we only use in a preparation such as this and do not nuke them and call it a side dish with dinner!).

photo 4 photo 5


While the veggies for this particular pot pie count as the “something old,” the “something new” is the pastry. Making the pastry is the first of two techniques important for creating the perfect pot pie – and it is the more scientific since pastry dough needs to be measured well.  [I provide Ina Garten’s recipe at the end of this post because it is where I first learned both of these, but as you can see from the photos, I don’t follow her recipe anymore.]

I have written about creating pastry doughs before, so here is a refresher.

  1. COLD butter, COLD water
  2. Pastry blender to cut the butter into flour mixture until it is the size of peas (it really is not worth the hassle of washing the food processor for cutting 30 seconds off the time it takes to make the dough)
  3. Add more water if the dough does not hold together. Add more flour if the dough is sticky. You want to avoid doing too much of this (though it’s sometimes unavoidable) because you dilute the butter and baking powder and the dough will not rise well.
  4. Chill the dough for 30 minutes before using it.

photo 1 photo 2


photo 3


The second (and less scientific) technique is in making the sauce for the pot pie. The first step is to essentially make a roux, which is a butter-and flour thickening agent.  After the vegetables have all sautéed in olive oil (Be sure to add any frozen vegetables and allow them to give off all their water before making the sauce! The roux will not work if the vegetables are still very damp), the pan is typically pretty dry since I like to get come carmalization on the veggies.  So, I add a pad of butter, just enough so that when it melts it VERY lightly coats the vegetables. Then, sprinkle the veggies with a coating of flour and stir to coat. At this point, the pan will again be very dry. I continue stirring for about 30 seconds longer than I think I should for fear that things will burn in order to (as Ina says) cook the raw flour taste out.

photo 6 photo 7

photo 8

The second step in the sauce creation is addition of liquid.  The “something old” adage comes into play here, also. The half-used box of stock in the back of your refrigerator will thank you! I do always start with about a tablespoon of dry vermouth to deglaze quickly and then I pour in stock (vegetable stock if you want this to be totally vedge) about half a cup at time and continue until there is a sufficient quantity of sufficiently-thick sauce.  A splash of milk, cream or half-and-half once the sauce is done is really the icing on top here. Be sure to taste for seasoning (salt, pepper, whatever herbs you have on hand – i used rosemary and thyme in this particular batch)!

All of these steps can be done ahead of time, as I did yesterday and just finished things off when Brandon got home from work.  Just scoop the filling into whatever oven-safe containers you would like to use. I use these dishes from IKEA: they’re shallow enough to make sure that each bite of filling has a bite of flake pastry as well!

An egg wash (a beaten egg with 1 Tbs water or milk added) is important for two purposes. It secures the pastry to the lip of the dish, and it also helps the pastry to brown well in the oven. I also salt (think pretzel!) and pepper the top of the pastry after the egg wash to make sure it has great flavor. Cut a few vent holes in the top of the pastry as well.

photo 10 photo 11

photo 9


Since everything in the pot pie is already cooked, putting the pot pies in the oven is essentially to bake the crust. Be sure to place the dishes on a baking sheet in case the pot pie bubbles over at all. Pour yourself a glass of wine and in 30-40 minutes in a 400 degree oven, the dishes will emerge: golden brown and delicious!


photo 12

Be sure to allow the pot pies to cool for a bit before eating!

Bon appétit.


Vegetable Pot Pie (Ina Garten’s recipe, use as a guide for above)

Ingredients
12 tablespoons unsalted butter (1 1/2 sticks)
2 cups sliced yellow onions (2 onions)
1 fennel bulb, top and core removed, thinly sliced crosswise
1/2 cup all-purpose flour
2 1/2 cups good chicken stock
1 tablespoon Pernod
Pinch saffron threads
1 1/2 teaspoons kosher salt
1/2 teaspoon freshly ground black pepper
3 tablespoons heavy cream
1 1/2 cups large-diced potatoes (1/2 pound)
1 1/2 cups asparagus tips
1 1/2 cups peeled, 3/4-inch-diced carrots (4 carrots)
1 1/2 cups peeled, 3/4-inch-diced butternut squash
1 1/2 cups frozen small whole onions (1/2 pound)
1/2 cup minced flat-leaf parsley

For the pastry:
3 cups all-purpose flour
1 1/2 teaspoons kosher salt
1 teaspoon baking powder
1/2 cup vegetable shortening
1/4 pound cold unsalted butter, diced
1/2 to 2/3 cup ice water
1 egg beaten with 1 tablespoon water, for egg wash
Flaked sea salt and cracked black pepper

Directions
Melt the butter in a large pot over medium heat. Add the onions and fennel and saute until translucent, 10 to 15 minutes. Add the flour, reduce the heat to low, and cook for 3 more minutes, stirring occasionally. Slowly add the stock, Pernod, saffron, salt, and pepper, and bring to a boil. Simmer for 5 more minutes, stirring occasionally. Add the heavy cream and season to taste. The sauce should be highly seasoned.

Cook the potatoes in boiling salted water for 10 minutes. Lift out with a sieve. Add the asparagus, carrots, and squash to the pot and cook in the boiling water for 5 minutes. Drain well. Add the potatoes, mixed vegetables, onions, and parsley to the sauce and mix well.

For the pastry, mix the flour, salt, and baking powder in the bowl of a food processor fitted with a metal blade. Add the shortening and butter and mix quickly with your fingers until each piece is coated with flour. Pulse 10 times, or until the fat is the size of peas. With the motor running, add the ice water; process only enough to moisten the dough and have it just come together. Dump the dough out onto a floured board and knead quickly into a ball. Wrap the dough in plastic and allow it to rest in the refrigerator for 30 minutes.

Preheat the oven to 375 degrees F.

Divide the filling equally among 4 ovenproof bowls. Divide the dough into quarters and roll each piece into an 8-inch circle. Brush the outside edges of each bowl with the egg wash, then place the dough on top. Trim the circle to 1/2-inch larger than the top of the bowl. Crimp the dough to fold over the sides, pressing it to make it stick. Brush the dough with egg wash and make 3 slits in the top. Sprinkle with sea salt and cracked pepper. Place on a baking sheet and bake for 1 hour, or until the top is golden brown and the filling is bubbling hot.

Posted in Uncategorized | Leave a comment

Summer Lovin’

I can not believe the summer is gone. Yes, I tried very hard to enjoy my weeks of free days in the late spring before I started residency. Yes, I mentally prepared myself for residency. But, no, one can not be fully prepared for residency.  The schedule is terrible, the feelings of inadequacy abound and, worst of all, my time for culinary experiments is VERY limited.

I did have a few moments, however, that I was able to spend in the kitchen amidst the moments of being at the hospital and sleeping (since that is all I feel like I do at this point). One of my favorites of the summer was THIS…

photo 1-3

Wait for it. Nutella. Ice. Cream. While Brandon may think that Nutella unadultered on a spoon is the way God intended us to enjoy this luscious substance (and I can’t say I disagree), I wanted to experiment a bit.

I do love ice cream during any season, but it seems that the summer is when we actually break out the electric ice cream maker and churn some of our own frozen treats. When I first got the ice cream maker, I played it safe with one-note sorbets and fairly expected flavors. As you’ll see, however, I have branched out.

photo 4-2


This particular recipe requires that you make a custard with egg yolks, cream and half & half. This is base for many ice cream recipes, but Nutella is added to the custard mix instead of sugar. I’d say it’s not a fair swap and is, instead, an upgrade.


photo 3-2 photo 5-2

Making a custard may seem daunting, but its quite simple. STIR until THICK. Stir because you don’t want the dairy sitting on the bottom of the pan to scorch. You’ll know when the custard has thickened because you can leave a trail with your finger on the back of a wooden spoon. You’ll then need to strain the custard to remove any lumps since even if you are the world’s best stirrer, there will likely be some coagulated egg that should be removed before freezing.

photo 2-2 photo 3-1

photo 4-1

I have learned in many circumstances, residency and cooking being only two, that I am not the most patient person. But I have also learned that one can not rush homemade ice cream. There are two points at which custard-based ice creams should be in the refrigerator or freezer to just chill (quite literally). The first time is when it is still hot and after it has been strained – the custard needs to be chilled before it can be frozen. (Cover with plastic wrap so a skin does not form on top of the custard as it cools)  After freezing it in the ice cream maker, you typically have pseudo-soft serve, so scooping the almost-frozen mixture into a container and allowing it to harden in the freezer for a few hours delivers the fully-frozen product I’m after.

photo 4photo 1

I have branched out in my ice cream making since my first melon sorbet. And I couldn’t leave well enough alone –  I didn’t just make Nutella ice cream. I also mixed in some homemade hazlenut-chocolate brittle just before scooping it into the container for it’s final freeze. Add-ins make an almost perfect product heavenly with complimentary flavors and often a delightful crunch.

photo 2-1 photo 3

photo 5


This brittle required me to make a toffee on the stovetop, pour it over blanched hazelnuts, sprinkle on some chocolate to melt, spread and let the whole thing cool.  I then broke it up, reserved a few larger pieces for garnish, and dumped a handful into the ice cream maker.


As I mentioned earlier, I enjoy a pint of good ice cream anytime of the year, but as the days get shorter, and the temperatures get cooler, I think I may try my hand at one more batch so I am not screaming for ice cream until next year.

photo 2

Bon appétit.

CRUNCHY NUTELLA ICE CREAM

Ingredients

  • 6 egg yolks
  • 1 cup half & half
  • 1 cup room-temperature Nutella
  • pinch kosher salt
  • 2 cups heavy cream

Directions

  1. Whisk together yolks, half & half, Nutella, and salt. Set aside.
  2. Heat cream until right before it comes to the boil (it will bubble along the edges). Turn off heat. Slowly whisk hot cream into the Nutella/yolk mixture. Pour mix back into pot and stir constantly on medium heat until until it thickens slightly. It’s ready when you draw your finger along the back of a wooden spoon and your finger leaves a trail. Turn off heat.
  3. Meanwhile, add a few cups of ice to a large bowl. Put a smaller bowl in the larger bowl. Place a fine strainer on top of the small bowl. Set aside.
  4. Pour custard through strainer into the small bowl. Add just enough water to the ice so that the cold water rises up to the level of the custard. Stir occasionally. When cool, remove from ice bath and cover with plastic wrap. Refrigerate for several hours.
  5.  Churn the ice cream according to manufacturer’s instructions. When frozen, add brittle (below).
  6. Freeze for a few hours or overnight.

Chocolate-Hazlenut Buttercrunch Toffee

(Adapted from The Perfect Scoop)

Ingredients

  • 2 cups (8 ounces, 225 g)  hazelnuts, blanched and chopped between ‘fine’ and ‘coarse’
  • 2 tablespoons water
  • 1/2 cup (1 stick, 115 g) salted or unsalted butter, cut into pieces
  • a nice, big pinch of salt
  • 1 cup (200 g) granulated sugar
  • 1/4 cup (50 g) packed light brown sugar
  • 1/4 teaspoon baking soda
  • 1 teaspoon vanilla extract
  • 5 ounces (140 g) bittersweet or semisweet chocolate, chopped, or 1 cup chocolate chips

Directions:

  1. Lightly oil a baking sheet with an unflavored vegetable oil.
  2. Sprinkle half the nuts into a rectangle about 8″ x 10″ (20 x 25 cm) on the baking sheet.
  3. In a medium heavy-duty saucepan fitted with a candy thermometer, heat the water, butter, salt, and both sugars. Cook, stirring as little as possible, until the thermometer reads 300 F degrees. Have the vanilla and baking soda handy.
  4. Immediately remove from heat and stir in the baking soda and vanilla.
  5. Quickly pour the mixture over the nuts on the baking sheet. Try to pour the mixture so it forms a relatively even layer. (If necessary, gently but quickly spread with a spatula, but don’t overwork it.)
  6. Strew the chocolate pieces over the top and let stand 2 minutes, then spread in an even layer
  7. Sprinkle the remaining nuts over the chocolate and gently press them in with your hands.
  8. Cool completely and break into pieces to serve.


Posted in Uncategorized | 1 Comment

Greens, Eggs and some Ham

As sustainability and locally-sourced ingredients become more popular, the options for obtaining good, local, in-season products also increase. Coming from a rural area where my grandparents were farmers, and many people had gardens in their back yards, the idea of “urban agriculture” was nothing short of strange to me. “You grew WHAT in North Philadelphia?!”

greensgrow_eventbrite_72

I think others are on board with this, so the popularity of sourcing local-ish ingredients from ag-rich suburbs is one of the most viable options in order to take advantage of the season’s bounty. Brandon and I are doing just that this year.  For the summer and early fall, we have a half share at the Greensgrow CSA. CSA stands for Community- (or City-) Supported Agriculture, and what it boils down to is a delivery of wonderful local vegetables, fruits and dairy every other Thursday. In order to incorporate our CSA fun into the blog, I will list the contents of each pick up, and write about what we did to use the majority of the ingredients.

Photo Jun 06, 18 02 07

Our first pick up was the last of the late spring produce:

  • Peas: Fifer Orchards, Camden-Wyoming, DE
  • Red Leaf Lettuce: Sunny Harvest LLC, Quarryville, PA
  • Strawberries: Fifer Orchards, Camden-Wyoming, DE
  • Bok Choy: Flaim Farms, Vineland, NJ
  • Asparagus: Fifer Orchards, Camden-Wyoming, DE
  • Organic Iceberg Lettuce: Marolda Farm, Vineland, NJ
  • Knob Pickles: A.T. Buzby Farm, Woodstown, NJ
  • Buttercup Brie: Cherry Grove Farms, Lawrenceville, NJ

We also, for our dairy option, get a dozen cage free eggs with every pick up (from Lancaster County, no less). So since we wanted to try the eggs out, and wanted to incorporate many of the vegetables into one dinner, we decided to whip up a frittata.

Photo Jun 06, 19 32 00 Photo Jun 06, 19 33 21

At its core, a frittata is simply a baked omelet. Vegetables are sautéed, the beaten eggs and some cheese is added, and then the whole thing is baked until it is puffed and cooked through. For this frittata, we used most of the vegetables in the basket (with the exception of the lettuce), and added some cubed ham and goat cheese (as we didn’t think brie would be the best choice).

Photo Jun 06, 19 28 28 Photo Jun 06, 19 39 48 Photo Jun 06, 19 41 09 Photo Jun 06, 20 12 45

After baked at 350 degrees until golden brown on the edges, we served the frittata next to a salad made of the lettuces in the basket dressed with a simple balsamic/olive oil vinaigrette. It is an easy, satisfying dinner that can be adjusted to suit any size brunch or dinner and one in which you can incorporate anything you have lurking in the fridge!

Bon appétit.

ROASTED VEGETABLE FRITTATA (from Ina Garten, recipe used as a guide for above)

Ingredients

  • 1 small zucchini, 1-inch diced
  • 1 red bell pepper, seeded and 1 1/2-inch diced
  • 1 yellow bell pepper, seeded and 1 1/2-inch diced
  • 1 red onion, 1 1/2-inch diced
  • 1/3 cup good olive oil
  • Kosher salt and freshly ground black pepper
  • 2 teaspoons minced garlic (2 cloves)
  • 12 extra-large eggs
  • 1 cup half-and-half
  • 1/4 cup freshly grated parmesan cheese
  • 1 tablespoon unsalted butter
  • 1/3 cup chopped scallions, white and green parts (3 scallions)
  • 1/2 cup grated gruyere cheese

Directions

  1. Preheat the oven to 450 degrees F.
  2. In a 10-inch ovenproof saute pan, melt the butter and saute the scallions over medium-low heat for 1 minute. Add the roasted vegetables to the pan and toss with the scallions.
  3. Meanwhile, in a large bowl, whisk together the eggs, half-and-half, parmesan, 1 teaspoon salt and 1/2 teaspoon pepper.
  4. Pour the egg mixture over the vegetables and cook for 2 minutes over medium-low heat without stirring. Transfer the pan to the oven and bake the frittata for 20 to 30 minutes, until puffed and set in the middle.
  5. Sprinkle with the gruyere and bake for another 3 minutes, until the cheese is just melted. Cut into 6 or 8 wedges and serve hot.
Posted in Uncategorized | 1 Comment

The Breakfast of.. Surgeons?

I have not written much recently since life has been very busy (in a good way). After my brother’s wedding was my graduation from medical school and all the guests, fun and celebrating that goes along with that. I trekked to northeastern Pennsylvania and my hometown of Sweet Valley for Memorial Day, and Brandon and I made it to the beach, to Lancaster for a day in the pool with our friends, and to the outskirts of Philadelphia on some long bike rides. (And I have kept busy with a couple of side jobs, too!) But throughout this period of vacation, I couldn’t shake the nagging feeling of the reality that I was going to have to start residency. And that day is tomorrow.

Have you ever watched Gray’s Anatomy? The clueless looks on the interns’ faces when asked to do what seems like the simplest of tasks? Yup – that’s going to be me. Up before the sun everyday and limited time to do much of anything non-work related.

You may be asking yourself how I am going to connect this all to the act of mincing and dicing, and you’re also probably hoping that it will be the preparation of food and not the curing of surgical ailments. Here it is. I have learned that no place causes the maternal nag of “Breakfast is the most important meal of the day!” than the operating room. When waking up at 4am, lunch is a long way’s off, so something that is filling is also important. Consequences of not eating breakfast range from simple crankiness (since the gurgling down below just wont stop) to fainting INTO (or close to) a patient on the table. I am only a primary source for the former, but I am a secondary source of the latter many times over.

The problem is, I HATE most breakfast food. The thought of sitting down to a bowl of boxed cereal is enough to make me gag, toast is fine but not filling, and most mornings do not afford the luxury of making French Toast or sausage gravy and biscuits. The good news is, however, that I have found a breakfast that I actually like. It takes minimal prep time (beforehand) and even less the morning of. It’s tasty, has varied textures and flavors, and is healthy!

Photo Apr 24, 19 57 16

I found this recipe for museli in Martha Stewart Living, and I fell in love. I have already written about how toasting nuts intesifies their flavor to that satisfying “golden brown taste” we all love. The nuts in this recipe are oven-toasted and end up being the perfect crunch in the morning.

Photo Apr 24, 19 59 32 Photo Apr 24, 20 01 46

First, all the ingredients are mixed with a bit of olive oil to enhance their browning. Note that the coconut here is dried and unsweetened flakes, not the kind that end up on a German Chocolate Cake, which might itself sound like a good breakfast – having tried it, I assure you it’s a good idea until you’re hungry again in an hour.

Photo Apr 24, 20 03 27 Photo Apr 24, 20 34 37

After the toasted museli is cooled and stored, all that needs to be done in the morning is pour some in a bowl and accessorize. I have found that a bit of thawed frozen fruit, a couple dollops of Greek yogurt and a drizzle of honey results in a perfect balance of tart, sweet, creamy and crunchy. After one bowl, I can successfully avoid hunger pangs or bad operating room etiquette all morning!

Photo Apr 25, 7 29 03

Bon appétit.


TOASTED MUESLI (from Martha Stewart Living, May 2013)

Ingredients

  • 3 cups old-fashioned rolled oats
  • 1/2 cup shelled pumpkin seeds
  • 1/2 cup large unsweetened dried coconut flakes
  • 2 tablespoons sesame seeds
  • 2 tablespoons extra-virgin olive oil
  • 2 tablespoons pure maple syrup
  • 1/4 teaspoon coarse salt

Directions

  1. Preheat oven to 325 degrees. Combine all ingredients in a bowl; mix well to coat.
  2. Transfer to a rimmed baking sheet and spread in an even layer.
  3. Bake, stirring once, until oats are lightly golden, about 20 minutes. Let cool completely.
Posted in Uncategorized | Leave a comment

Wedding Weekend

20130513-162203.jpg

This weekend Brandon and I took a hiatus from cooking and instead enjoyed some wonderful BBQ at the wedding of my brother, Heath, and new sister-in-law, Lia. We had the most amazing time.

Posted in Uncategorized | Leave a comment

El Tercero Cinco de Mayo

20130506-213122.jpg

The third Cinco de Mayo. Yes, this year on May 5th, Brandon and I celebrated our third anniversary. We did so by also running our third Broad Street Run (Philadelphia’s annual 10 mile race) together. And when I say together, I mean that after Mile 3, Brandon left me in the dust since I hadn’t trained at all for the race. Brandon beat his best time, finishing in 81 minutes, and I did well considering my unpreparedness, crossing the elusive finish line in 93 minutes.

20130506-213019.jpg

While the run doesn’t usually fall on our anniversary, we always need a drink- or ten -to help recuperate.  It has become our anniversary tradition to make (at least) a pitcher of Ina Garten’s “Real Margaritas” with which to celebrate, so this year we combined the two. These margaritas are easy, delicious, pack a punch, and don’t hold a candle to anything that comes pre-made in a bottle.

20130506-213030.jpg20130506-213048.jpg

20130506-213039.jpg

“The keys to this recipe,” Ina writes, “are to use fresh lime juice and inexpensive tequila.” and that’s just what we do. We start by squeezing limes and a lemon with a small citrus juicer from the 70s that I stole from my mother. It really makes quick work of all the juicing. While it doesn’t make a difference when juicing with an electric juicer, roll the citrus on the board before cutting to make manual squeezing a bit easier.


Next, either combine the ingredients over ice or in a blender. We prefer our margaritas on the rocks, so we just pour everything into a pitcher and give it a stir.

20130506-213056.jpg

20130506-213111.jpg

A margarita in our book is also not complete without a well-salted glass. I cut a piece of the squeezed lime and run it around the rim of the glass before dipping it in a small dish of kosher salt.

We served our margaritas alongside grilled shrimp with homemade mango salsa this year One ice cube goes in each glass and a big pour of this faintly green elixir sends us south of the border.

¡Buen provecho (Bon appétit!)


REAL MARGARITAS (from Ina Garten’s Barefoot Contessa Parties)

Serves 6 (or just the two of us!)

Ingredients

  • 1/2 cup freshly squeezed lime juice (5 limes)
  • 2 tablespoons freshly squeezed lemon juice (1 lemon)
  • 1 cup Triple Sec
  • 3 cups ice
  • 1 cup white tequila
  • Kosher salt

Directions

  1. Combine the lime juice, lemon juice, Triple Sec, and tequila over ice in a  pitcher.
  2. Dampen the rim of serving glasses with juiced lime rind and dip in salt.
  3. Serve in salted glasses over ice.

If you prefer frozen margaritas, halve each of the ingredients, double the ice, and blend in two batches.


Posted in Cocktails | Leave a comment

Beet of my Heart

20130428-202056.jpg
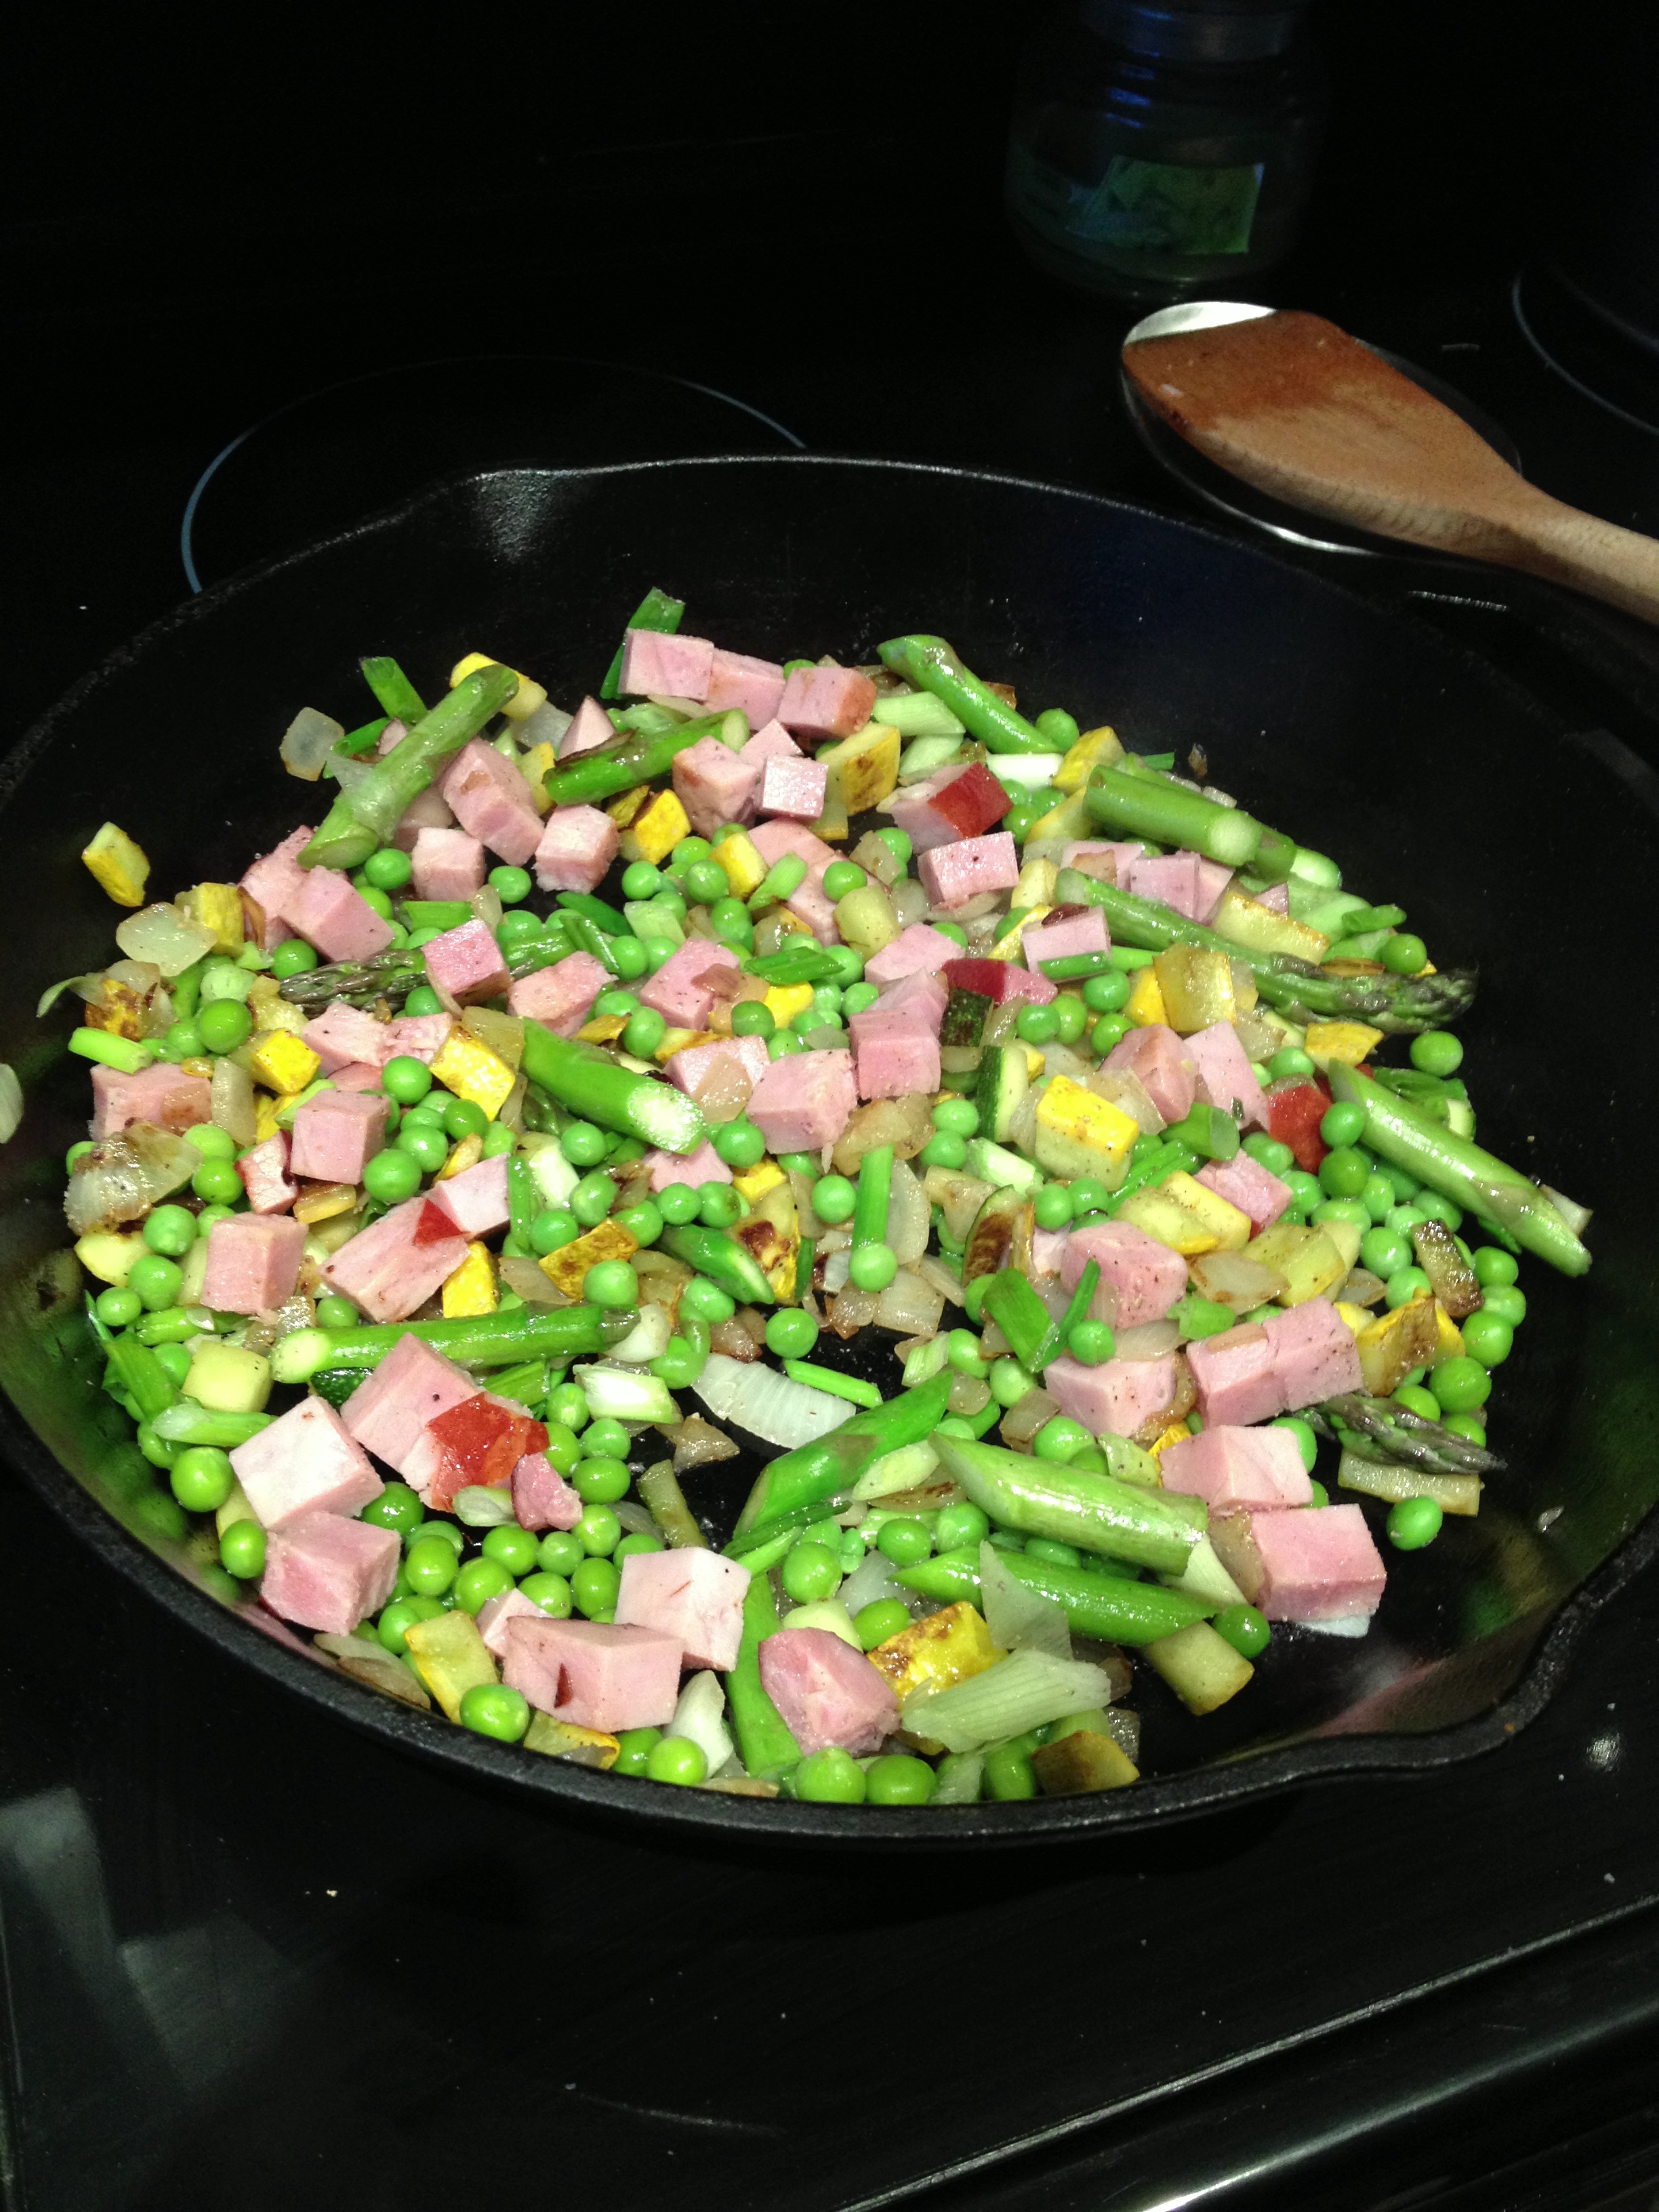
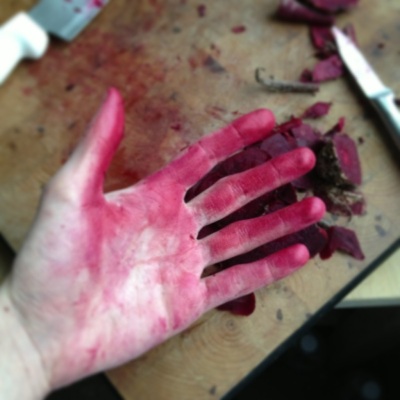
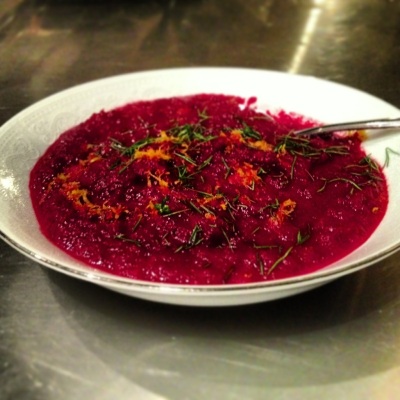
I am always excited at the beginning of each season to begin cooking with the  produce that is only available at that particular time of year.  There are, however, always a few items from the previous season that I am not quick to give up.  As we make the official don’t-look-back transition from winter to spring, I am excited about all things fresh and green, but I am having a hard time letting go of root vegetables. A simple tray of roasted root vegetables is a welcome part of dinner any night of the week: it’s tasty and takes virtually no effort and few ingredients.  This winter, we experimented a lot with these uglies in other preparations as well.

20130428-201757.jpg

Enter the beet.  Growing up, I thought that a beet’s sole purpose in life was to be pickled. I would turn my nose up at these vinegary, earthy beets that were floating alongside hard-boiled eggs in a jar of oddly-colored liquid in the refrigerator.  I now like even pickled beets, but I first learned to love the purple gems roasted, served with goat cheese on a bed of arugula.  I must say, roasting beets (and really any root vegetable) gives them  a rich, almost-sweet flavor that no other way of preparing them can.  Combine this with some vegetable stock and other vegetables and you have yourself a pretty knock-out, vegan soup.

20130428-201811.jpg

The only problem with beets, though, is that odd color.  No matter how you go about peeling and preparing them, you end up with purple hands unless you wear gloves.  I actually don’t mind this temporary stain and wear it proudly for a few hours (until I do the dishes) like some kitchen-battle wound.  In this recipe the beets are peeled before roasting since they have a friend (chopped fennel) on the roasting pan.  I also like to roast them wrapped in aluminum foil and just rub the skin off the cooled beets with a paper towel.  No matter how you do it, embrace being BEET RED while it lasts.

Fennel with it's root still attached (www.whiteonricecouple.com)

Fennel with it’s roots still attached (www.whiteonricecouple.com)


I think fennel is an even more misunderstood vegetable than beets.  The bulb, which is the swollen white part attached to the green fronds, may look like a root, but actually does not grow underground. The fennel bulb, with its green fronds, is shown above with its roots still attached.  The fronds are flavorful (and are used as a tasty garnish for this soup), but the bulb is used most frequently in recipes.

20130428-201823.jpg 20130428-201855.jpg

To prepare the fennel bulb, chop off the fronds,  and cut the bulb in half.  Next, remove the core from both halves (from which the roots were removed before you purchased it) by slicing in the shape of a triangle.  Then, chop the bulb according to the recipe you’re using.

20130428-201912.jpg 20130428-201925.jpg

The fennel met the beets in a bowl with olive oil, salt and pepper.  As I mentioned here, although technically dirtying another dish, I think washing an extra bowl is worth it to assure that each vegetable piece is well oiled and seasoned.

20130428-201939.jpg 20130428-202002.jpg

20130428-202038.jpg

Immersion blender making quick work of the puree

After the oven, it is just a matter of combining the vegetables with sautéed onions and vegetable stock and pureeing either in a blender or with an immersion blender. Regardless of your puree tool of choice, be careful not to splatter purple all over the kitchen (like I did), or your clean white chef’s coat (like I did) — as pictured below, a Valentine’s Day gift from Brandon!!  The addition of orange juice and red wine vinegar brightens the flavor of this soup, and the garnish of orange zest and fennel fronds makes it sing.

20130428-201732.jpg

This soup would make an excellent fireside, mid-winter meal, and just as successfully keeps you warm next to a vase of freshly-picked tulips during a still-chilly spring night.

Bon appétit.

Roasted Beet Soup with Fennel and Orange

Serves 4

Ingredients

  • 2 pounds beets, peeled and cut into 1/2-inch cubes
  • 1 large (about 1 pound) fennel bulb, cut into wedges (reserve fronds for garnish)
  • 4 tablespoons extra virgin olive oil, divided
  • 1/2 teaspoon dried thyme (or 2 teaspoons fresh)
  • Kosher salt
  • Freshly ground black pepper
  • 1 large onion, sliced
  • 2 garlic cloves, chopped
  • 4 cups vegetable stock
  • 1 cup freshly squeezed orange juice (reserve zest of 1 orange for garnish)
  • 1/2 teaspoon red wine vinegar

Directions

  1. Preheat oven to 400°F.
  2. Toss the beets and fennel with 2 tablespoons of olive oil, thyme, a generous pinch of salt and freshly ground black pepper. Spread evenly on a baking sheet and roast, stirring occasionally, until the beets are tender, about 45 minutes.
  3. Heat the remaining 2 tablespoons of olive oil in a large pot over moderate heat. Add the onion and cook, stirring occasionally, until softened, about 15 minutes. Add the garlic and cook, stirring, for a minute or two until fragrant. Add the beets, fennel, and vegetable broth, bring to a boil, and then reduce to a simmer for 15 minutes.
  4. Puree the mixture in a blender (working in batches) or with an immersion blender. Transfer the puree to a large pot and bring to a simmer. Stir in the orange juice and vinegar. Salt to taste.
  5. To serve, garnish with orange zest and fennel fronds.


Posted in Vegan, Vegetable | Leave a comment

I Did It!

photo 2(4)

I am fairly adventurous in the kitchen, and there isn’t much that I won’t try.  Hollandaise sauce, however, has been something I have avoided because the list of cautions, dos and don’ts that is typically longer than the recipe itself.  I mustered up “the courage of (my) convictions” (as Julia would say), when I found the recipe for this easy, delicious asparagus tart.  I knew it needed to be served with something; since hollandaise is classically paired with asparagus, and I love the tast of mustard with Gruyere, I decided to try my hand at a Dijon hollandaise.

photo 2(3)photo 3(3)

The tart begins with defrosted puff pastry, which is one of my favorite pre-made ingredients to have on hand.  It is rolled out, a border, which will form the crust on the edges of the tart is scored, and the middle of the tart is pricked with a fork.  It is important here to not score all the way through the pastry since this will cause them to separate while pre-baking, and to prick the center very well so it does not puff to much.

photo 5(3) photo 4(3)

photo 2(5) photo 3(5)

Once pre-baked, the tart is lined with grated Gruyere and after the asparagus is arranged, they are brushed with oil and salt and pepper.

“That was the easy part,” I thought to myself as I grabbed the butter and lemon. When I did online searches, and even looked in Ina Garten’s cookbook, for hollandaise recipes, most people say that the use of a blender makes the preparation of this finicky sauce much easier. While Julia was even an advocate of doing certain things “by machine,” I decided to hoof it and whisk by hand for my first go-around.

photo 1(5) photo 4(5)

First the egg yolks are whisked with lemon juice, salt, pepper and cayenne until it becomes lighter — lemon-colored.  The melted butter is then SLOWLY whisked in until fully incorporated.  This is the sauce that would come from the blender, but more traditionally the sauce was thickened.

photo 5(4)

By just whisking for a minute or two over a pan of simmering water (effectively a double boiler), thickens the sauce nicely.  What results is a yellow, tangy, velvety hollandaise into which I whisked about a tablespoon of Dijon in order to complement the Gryuere in the tart.

photo 3(4)

I used a pizza cutter to slice the tart when it came out of the oven, dolloped some of the hollandaise and served alongside a sauteed lamb chop (courtesy of Brandon, who had his fingers crossed throughout the duration of the hollandaise experiment!).  Both before and after a taste, all I could say was “I DID IT!”

Bon appétit.

ASPARAGUS-GRUYERE TART

Ingredients

  • Flour, for work surface
  • 1 sheet frozen puff pastry
  • 5 1/2 ounces (2 cups) Gruyere cheese, shredded
  • 1 1/2 pounds medium or thick asparagus
  • 1 tablespoon olive oil
  • Salt and pepper

Directions

  1. Preheat oven to 400 degrees.
  2. On a floured surface, roll the puff pastry into a 16-by-10-inch rectangle. Trim uneven edges. Place pastry on a baking sheet. With a sharp knife, lightly score pastry dough 1 inch in from the edges to mark a rectangle. Using a fork, pierce dough inside the markings at 1/2-inch intervals. Bake until golden, about 15 minutes.
  3. Remove pastry shell from oven, and sprinkle with Gruyere.
  4. Trim the bottoms of the asparagus spears to fit crosswise inside the tart shell; arrange in a single layer over Gruyere, alternating ends and tips. Brush with oil, and season with salt and pepper.
  5. Bake until spears are tender, 20 to 25 minutes.


DIJON HOLLANDAISE

Ingredients

  • 6 tablespoons unsalted butter
  • 2 extra-large egg yolks, at room temperature
  • 1.5 tablespoons freshly squeezed lemon juice
  • Kosher salt and freshly ground black pepper
  • 1 pinches of cayenne pepper
  • 1/2 – 1 tablespoon Dijon mustard

Directions

  1. Melt the butter in a small sauce pan.
  2. Whisk the egg yolks, lemon juice, 3/4 teaspoons salt, 1/2 teaspoon pepper and cayenne in a large bowl until a light lemon color.
  3. Slowly whisk the hot butter into the sauce.
  4. Place the bowl over a double boiler and whisk until the sauce thickens, about 1 minute.
  5. Whisk in the mustard and serve hot.
Posted in Uncategorized | Leave a comment

The Peas to Heaven

photo 3

Spring has finally sprung and it is heavenly.  And it means that I am still on my green kick as the fresh spring produce has filled the shelves and bins at the market.  Coincidentally, one of the first-to-arrive spring veggies was my LEAST favorite as a child: peas. (Though I do find myself most enjoying things that 12-year-old me would not even consider food!) We used the little green babies in several forms in our Easter menu, and while researching recipes I stumbled across a recipe that made me do a double take.  PEA PANCAKES?!?  Yes, pea pancakes.  Who knew?!

So, while we were doing the prep work last Saturday for Easter dinner, I whipped up a small batch of the green fritters as Brandon and I immediately fell in love.  So much so that we shared the one that was left over for a pre-dinner snack on Saturday evening.  When our vegetarian friend told us she’d be in town this past weekend and wanted to get together for brunch, I instantly knew what I wanted to make.

Honestly, these pancakes are so simple that there isn’t much to say about them!  I will say that this is one recipe in which I am okay with employing the microwave to quickly melt the butter for the batter.

photo 1 (1)photo 2

Also, I came across several recipes that tell you to add the dried dill, turmeric and coriander to the dry ingredients in the batter.  Instead, I add them to the sauteed onions and allow them to almost toast for a bit while their flavors become incorporated into the onions. Their intensified flavors are, therefore, better-incorporated into the fritters.

photo 3 (1) photo 4 (1)

As far as the peas are concerned, I will probably also surprise you when I say that I prefer using frozen peas in this recipe! I do love fresh peas in a number of applications, but here opening the box of frozen peas simplifies this recipe since they do not need to be-pre-cooked.  They are likely a bit sweeter than the spring peas at the market, anyway.  The simply get dumped into the spice-onion mixture and then smashed with the back of the wooden spoon once they’ve thawed.

photo 5 (1) photo 1

I also did not use the same non-stick pan in which I sautee the onions for frying the pancakes as most of the recipes I saw suggest.  I prefer the temperature control and uniformity that I get from cast iron for this purpose.  Don’t be afraid to add more oil as you work your way through the batter since a dry pan really doesn’t do much.  I also found that 2 tablespoons of batter makes the best size pancakes, both for frying and eating.

photo 5

We topped the pancakes with smoked salmon, Greek yogurt and a sprinkle of chopped fresh dill.  Served alongside (bottomless) mimosas, these pea pancakes made a divine main course.  I then whipped some cream in which we dipped fresh whole strawberries for dessert.  Heaven indeed.

photo 2 (1) photo 4

Bon appétit.

PEA PANCAKES

Yield: about 12 pancakes

Ingredients:

  • 1 boz (10 oz) frozen green peas
  • 1 cup diced onion
  • 3/4 teaspoons dried coriander
  • 1/4 teaspoon tumeric
  • 1 teaspoon dried dill
  • 1.25 teaspoons salt, divided
  • 1/2 cup all-purpose flour
  • 2 teaspoons baking powder
  • 1 egg
  • 1/3 cup milk, room temperature
  • 3 tablespoons butter, melted
  • 5 tablespoons olive oil, divided

Directions:

  1. Heat 3 tablespoons of olive oil in a large sauté pan over medium heat. Add the onions and season with 3/4 tsp salt; cook, stirring occasionally, for 10 minutes until softened and starting to brown.
  2. Add the dried spices to the onions, stir to combine, and allow to “toast” for about 1 minute.
  3. Add the frozen peas and cook for 5-8 minutes and, once thawed, smash with a wooden spoon or potato masher until about 1/3 of the peas are mashed. Let cool a bit.
  4. In a large bowl, whisk the flour, baking powder, remaining 1/2 tsp salt, eggs, milk and butter together to make a batter. Fold in the vegetable mixture to combine.
  5. Wipe down the sauté pan with a paper towel (or place a cast iron skillet over medium heat) and heat the remaining 2 tablespoons oil over medium heat. For each pancake, spoon 2 tablespoons of the batter into the pan and fry, about 2-3 minutes per side, until golden browned and crisp. Transfer to a plate lined with paper towels and keep warm.
  6. Serve with Greek yogurt or crème fraîche, fresh dill and smoked salmon, if desired.
Posted in Brunch, Vegetable | Leave a comment